Set up the GitHub OAuth App
To get started, we need to set up an OAuth App in Github. Within your GitHub Account Settings, click OAuth Apps under Developer Settings. Go ahead and create a "New OAuth App".
Since you are testing your app locally, you'll create a development GitHub app that redirects to localhost. Eventually you'll need to create separate OAuth Apps: one for development and a production app whose URLs will connect to the live domain. We'll circle back to the production app once when we cover hosting.
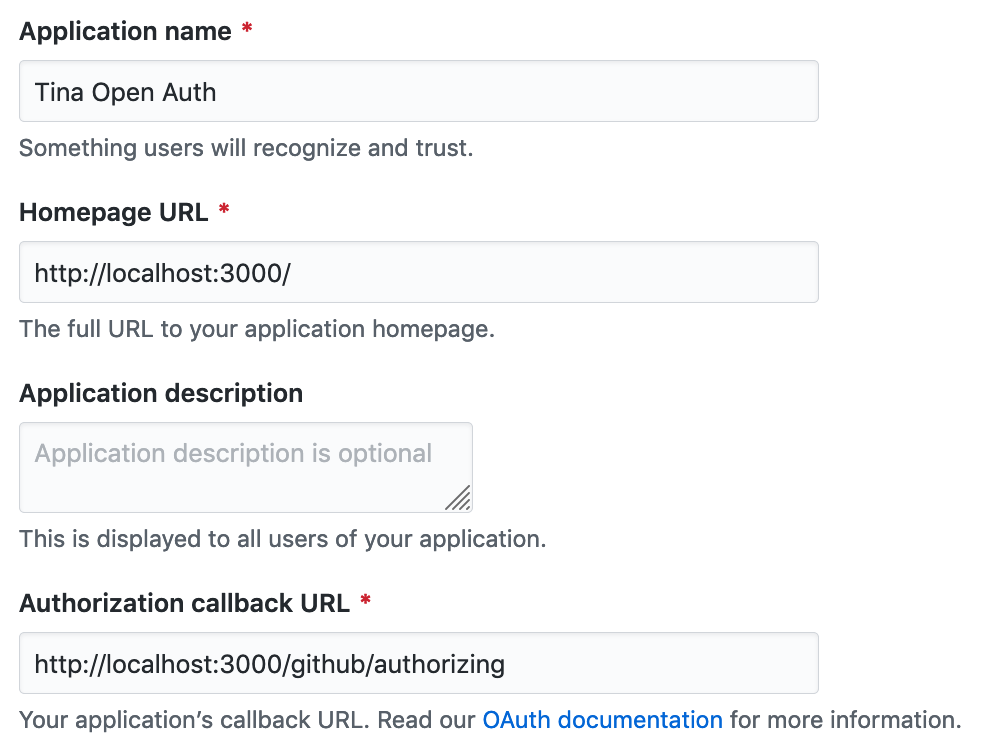
For now, fill in http://localhost:3000 for the Homepage URL. With the Authorization callback URL, enter http://localhost:3000/github/authorizing. This is the URL for an authorizing redirect page that we will create at a later step.
Once the details are filled in, Go ahead and click 'Register Application'. After creating the app, you should see a page with information such as Client ID and Client Secret. Next, we'll add those as environment variables to the project to connect this App to the Tina-GitHub helpers.
Setting Environment Variables
Environment variables are sensitive values specific to your project. The Tina-GitHub helpers will use these values to talk to your repository, enabling auth and data fetching via GitHub.
You will need a secret Signing Key, which should be a random 256-bit key. This key used server-side to encrypt and decrypt authentication tokens sent to the client.
You can generate a key by running openssl rand -base64 32 in your terminal, using the output as your Signing Key.
To set these variables, create a .env file in your project root. Add the secret and id values from the OAuth App, add your secret Signing Key, and fill in the repo name.
Do not commit this file! You will want to add
.envto your.gitignorefile.
.env
# OAuth App Credentials from GitHub
GITHUB_CLIENT_ID=
GITHUB_CLIENT_SECRET=

# The path to your repository in GitHub
REPO_FULL_NAME=my-github-user/my-github-repo

# The base branch that new changes and forks are created from. Usually 'master' or 'main' on newer repos.
BASE_BRANCH=main

# The signing key used for token encryption
SIGNING_KEY=You can use the dotenv package to load the .env file:
yarn add dotenvNow, to load these .env values in the front-end, create a file called next.config.js in the root of your project. Add the code from this example:
next.config.js
require('dotenv').config()

module.exports = {
  env: {
    GITHUB_CLIENT_ID: process.env.GITHUB_CLIENT_ID,
    REPO_FULL_NAME: process.env.REPO_FULL_NAME,
    BASE_BRANCH: process.env.BASE_BRANCH,
  },
  // ...
}Note that we did not add
GITHUB_CLIENT_SECRETorSIGNING_KEYto the exported configuration. Environment variables we add here are injected by Webpack at build time and will be present in the JavaScript bundle sent to the client. SinceGITHUB_CLIENT_SECRETandSIGNING_KEYwill only be used in our server-side code, and we don't want it exposed to the client, we will avoid adding it here.
Our GitHub App is up and running! Next, we will set up some API functions to handle content editing.
Last Edited: March 31, 2021